
Captions turn a video that only half your audience understands into one that everyone can follow. This guide walks you through adding captions in Premiere Pro in plain, simple steps — no editing experience required.
Table of Contents
What Are Captions in Premiere Pro (and Why Beginners Need Them)
Before you touch the software, it helps to know what you’re actually building.
Captions are on-screen text that shows spoken dialogue and important sounds, like [music] or [door slams]. They’re different from subtitles, which usually just translate speech for viewers who can hear fine but don’t understand the language.Pro lets you create both, but this guide focuses on captions.
Captions aren’t optional anymore. As much as 85 percent of video views on platforms like Facebook happen with the sound completely off. That means if your video has no captions, most people scrolling past it are missing the message entirely.
There’s also a legal side. In the US, the Americans with Disabilities Act (ADA) pushes businesses toward accessible content, and captions are one of the simplest ways to meet that standard. Beyond compliance, captions help viewers with hearing loss, non-native English speakers, and anyone watching in a quiet office or a loud gym.
Premiere Pro supports several caption formats, including SRT, VTT, and MCC. Knowing this now saves confusion later, when you’re deciding how to export your finished video.
🔗 MUST VISIT
320+ National Boyfriend Day Captions: Funny, Cute & Savage Ideas for Instagram
Explore Now →How to Add Captions in Premiere Pro Automatically
This is the fastest way to caption a video, and it works well for most beginners.
Open your project and go to Window > Workspaces > Captions and Graphics, or press Alt+Shift+4 on Windows (Option+Shift+4 on Mac). This switches your layout to a caption-friendly view.
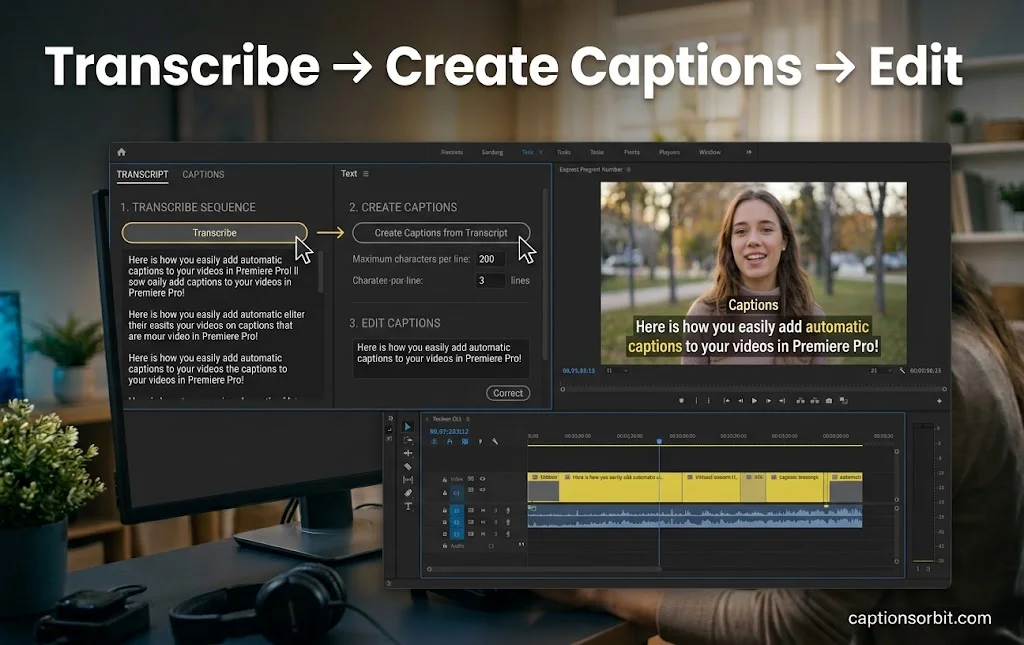
Next, open the Text panel by going to Window > Text. With your sequence selected, click Transcribe Sequence. Pro will ask which language to use and whether to detect multiple speakers. Choose your settings and hit Transcribe.
The software listens to your audio and builds a transcript using speech recognition. This usually takes just a few minutes, depending on how long your video is.
Once the transcript is ready, click Create Captions. You’ll get a dialog box asking about line length, minimum duration, and format. A common starting point is one line per caption, around 32-42 characters, with a minimum display time of 1.2 seconds so viewers have enough time to read.
Click Create, and a new caption track appears right on your timeline.
Always proofread the auto-generated text. Speech recognition is good, not perfect — names, technical terms, and background noise can trip it up.
How to Add Captions Manually or Import an SRT File
Sometimes automatic transcription isn’t the right fit, especially for scripted content or videos where accuracy matters a lot.
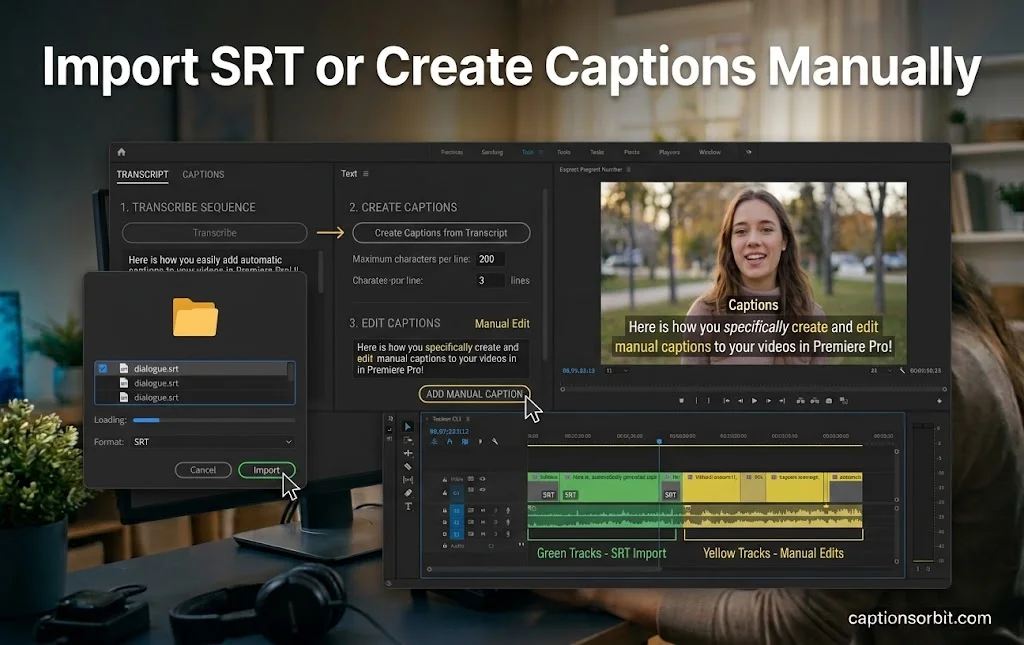
If you already have a caption file, like one from a transcription service, drag that SRT file straight onto your timeline. Premiere automatically builds a caption track from it, matched to your video’s timing.
Prefer to type everything yourself? In the Project panel, click New Item > Captions. Choose between Open Captions, which are burned permanently into the video, or Closed Captions, which viewers can turn on or off. Click OK, and an empty caption track lands on your timeline.
From there, select the track and start typing directly in the Captions panel. You can adjust timing by dragging the edges of each caption block, just like trimming a video clip.
One thing beginners often miss: Premiere treats your transcript and your captions as two separate pieces of data. If you edit the transcript after captions are created, the captions won’t automatically update, and vice versa. Keep this in mind so your text stays consistent.
How to Style and Export Captions in Premiere
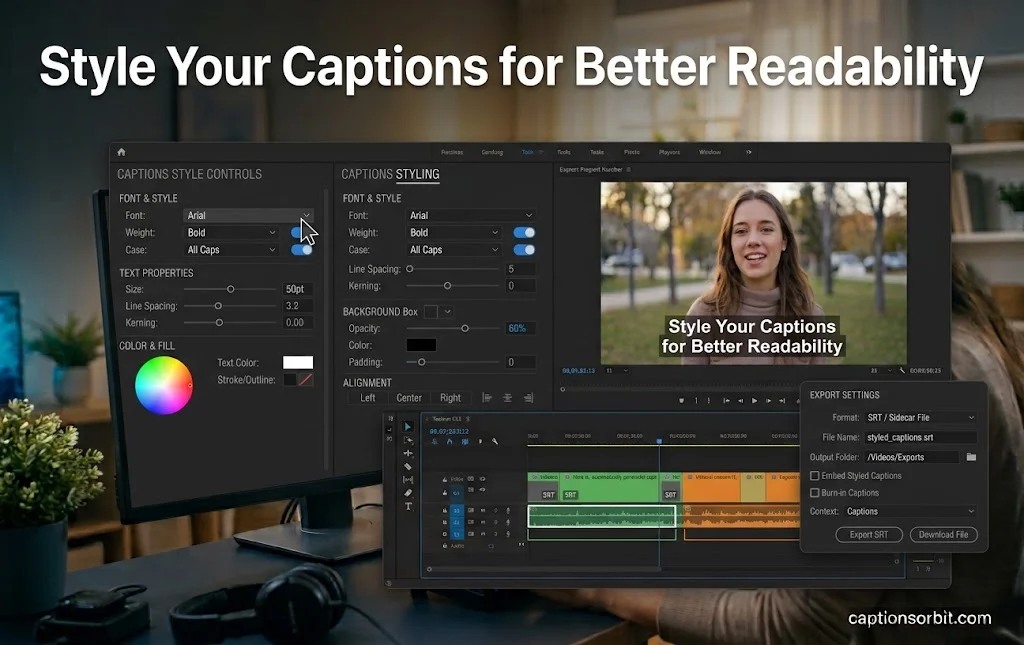
Captions that are hard to read defeat the purpose, so styling matters.
Select your caption track, then open the Essential Graphics panel to adjust font, size, color, and background. A bold, readable font with a semi-transparent background box usually works best across devices. Once you find a look you like, save it as a preset so every future project matches your brand.
When you’re ready to export, you have two main paths. Open captions get baked directly into the video frame, which works everywhere but can’t be turned off. Closed captions stay as a separate, toggleable layer, which is better for platforms like YouTube that read caption files independently.
If you’re exporting for social media, burned-in open captions are usually safer, since apps like Instagram and TikTok don’t always support separate caption files. For YouTube or a website video player, exporting a standalone SRT or VTT file alongside your video gives viewers control over whether captions show.
Common Mistakes to Avoid When Adding Captions in Premiere
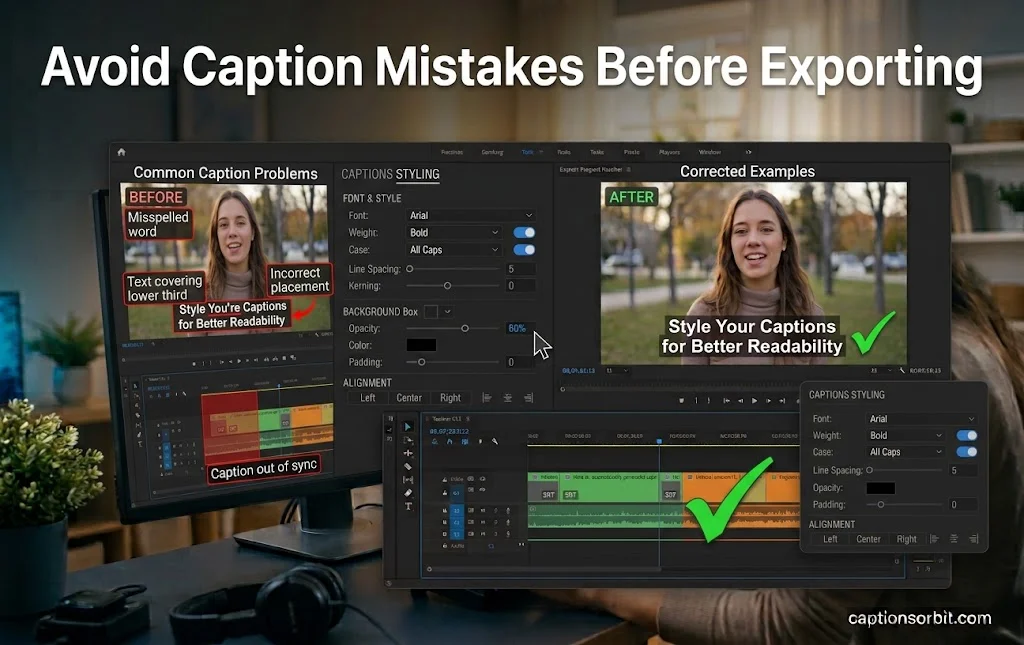
A few small errors show up again and again with new editors, and they’re easy to fix once you know what to look for.
Skipping the proofread step is the biggest one. Auto-transcription can misspell names or drop words entirely, so always read through before exporting.
Watch caption placement too. Text that overlaps a lower third, logo, or subtitle from another element looks unprofessional and can hide important information.
Frame rate mismatches between your caption file and your sequence cause captions to drift out of sync over a long video, so double-check both are set to the same rate before you start.
Finally, test your export. Play it back muted and then with sound on — this catches timing issues and confirms your captions actually appear where you expect.
FAQs
How do you add captions in Premiere Pro for free?
Captioning tools are built directly into Premiere. You don’t need a plugin or separate app — just use the Text panel’s Speech to Text feature.
Does Premiere auto-generate captions?
Yes. The Transcribe Sequence tool in the Text panel listens to your audio and builds a transcript, which you can then convert into captions with one click.
What’s the difference between captions and subtitles in Premiere?
Captions include sound descriptions for viewers who are deaf or hard of hearing. Subtitles assume the viewer can hear and are mainly used for translation.
Can I import an SRT file into Premiere?
Yes. Drag the SRT file onto your timeline, and Premiere creates a matching caption track automatically.
How do I burn captions permanently into my video in Premiere?
Choose Open Captions when creating your caption track, then export normally. This embeds the text directly into the video frame.
Conclusion
Adding captions in Premiere Pro takes just a few clicks once you know the workflow — transcribe, create, style, and export. Whether you go fully automatic or build captions by hand, the payoff is a video that’s easier to understand, more accessible, and ready for viewers watching with the sound off.

Abroy Ehtisham is a dedicated website Captions Orbit author and content lead who specializes in crafting engaging, highly detailed, and insightful digital content designed to cut through online noise. Driven by a deep commitment to audience-first communication, clear narrative structuring, and thorough research, Abroy explores the evolving landscape of web culture, online media, creative strategy, and community building.
![250+ Best Back to School Captions for First-Day Photos [Parents & Students Guide]](https://captionsorbit.com/wp-content/uploads/2026/08/Best-Back-to-School-Captions-14-150x150.webp "250+ Best Back to School Captions for First-Day Photos [Parents & Students Guide]")









![250+ Best Back to School Captions for First-Day Photos [Parents & Students Guide]](https://captionsorbit.com/wp-content/uploads/2026/08/Best-Back-to-School-Captions-14-768x484.webp)